Vosges 220 mm mortar
This diorama is directly inspired by this photograph displayed at the Hartmannswillerkopf Battle Museum in the Vosges Mountains, and by my visits to the Linge and Tête des Faux battlefields in the region, as well as other 1914-1918 battle zones.
The 220mm mortar is a resin kit from Blitz, which is very easy to assemble and is painted with a mix of blue and gray. I haven’t tried to make any particular improvements, but I know that purists might find things to enhance.
The figures are also from Blitz, and I simply used a Blitz Alpine Chasseur head to give the diorama a typical look. The donkey, the only reliable means of transport in the region at the time, is from Model Victoria, and I customized it based on period photographs.
The rest of the diorama is homemade with insulation, gravel, Mig scenery earth, Zeechium, wooden spatulas and rods, and miniart or other elements for the crates and equipment.


End of race for A7V
It’s autumn 1918. The German army is retreating, with the French army nipping at its heels, and is forced to abandon its new motorized equipment and its still-developing tanks.
The A7V is a substantial kit from Meng, highly detailed with an interior, gunner’s position, and driver’s compartment. Assembly isn’t for beginners, as the slightest mistake will be punished at some point. The most challenging part is closing the four side panels and attaching the roof. I really struggled with that. The rest of the build is a good challenge. I forgot the paint color references. After the usual washes, drybrushing, and a few light coats, the weathering is completed with a generous application of Mig mud.
The Copper State armored car is also a very nice kit; the instructions are very detailed and easy to follow. Its only drawback is that the model remains fragile once assembled; the headlights and suspension started to detach towards the end. The color scheme is a mix of Tamiya gray and blue over a black and white base. Like the A7V, the weathering relies on mud, pigment, and Mig paint.
The diorama is a base covered with Mig mud and various flocking materials. The building is an Italeri kit, and the trees are scratch-built using putty.
The figures are Stalingrad, Blitz, and Black Dog kits painted in Vallejo. The German colors are 830 and 924, and the French blue is 943.


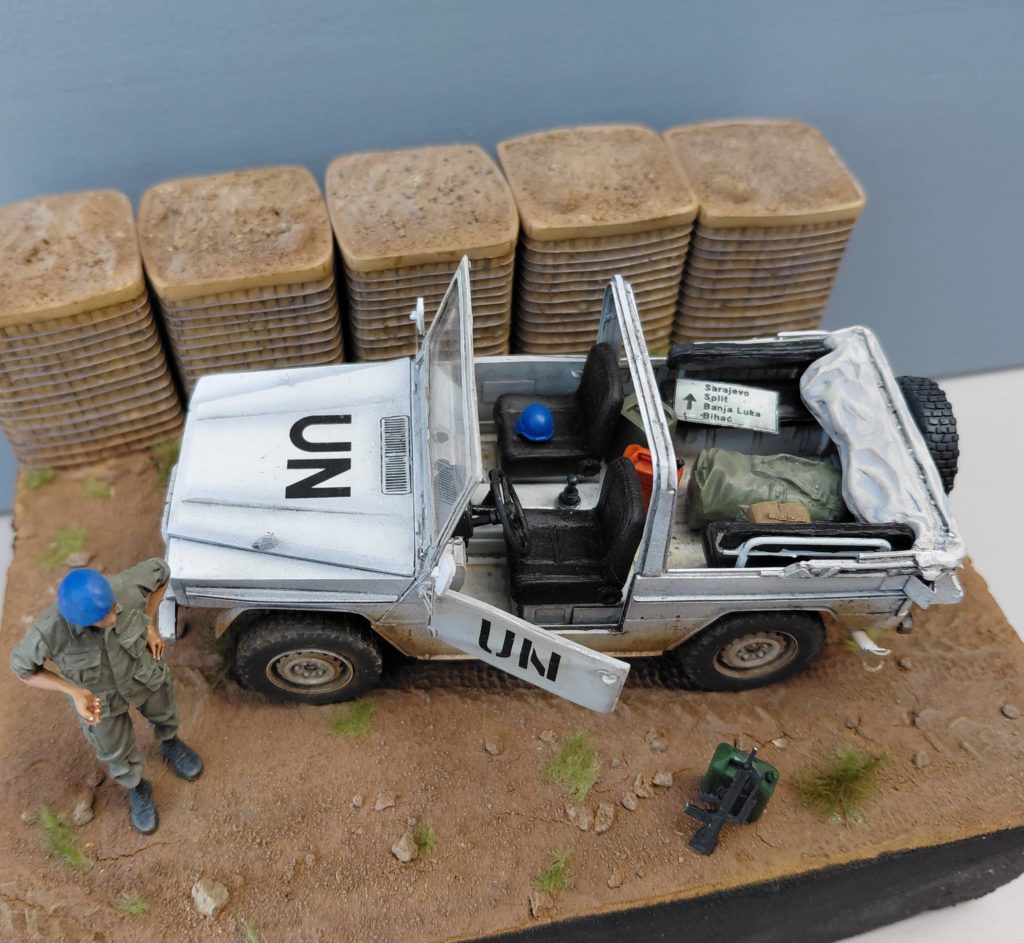
Peugeot P4 – UN Yougoslavia
Peugeot P4 on a UN mission in Yugoslavia. It’s a resin kit from Azimut, and these kinds of kits are always a bit of an adventure. You have to guess the position of the parts because the instructions are brief, do dry runs, anticipate the sanding order to make the steps match up, and rework some parts with hot water or a file. But to be honest, I thought it would be more of a struggle. My final impression is quite good; it’s certainly not a kit for beginners, but it’s still affordable and buildable, and I enjoyed it. Even the window wasn’t too difficult to install. It’s painted in the UN colors for Yugoslavia for my friend Eric, with pre-shading. The decals are from my spares box or homemade prints for the registration. I inserted gauges that I covered with a UV-curing clear gel for the dials. The kit also comes from spare parts and homemade decal printing, filling the trunk. The figure is a modified Bravo 6 with a Verlinden head painted in Vallejo 886. The diorama is a simple piece of insulation coated with a MIG product, and the defensive barriers are resin casts made by a colleague at Warpaints.




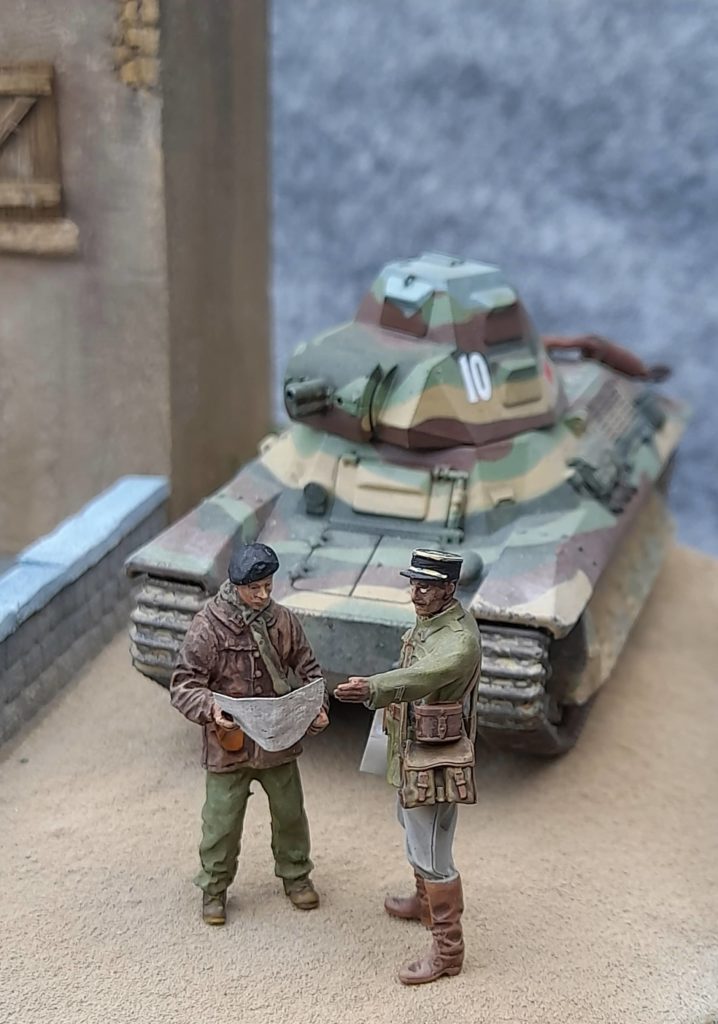
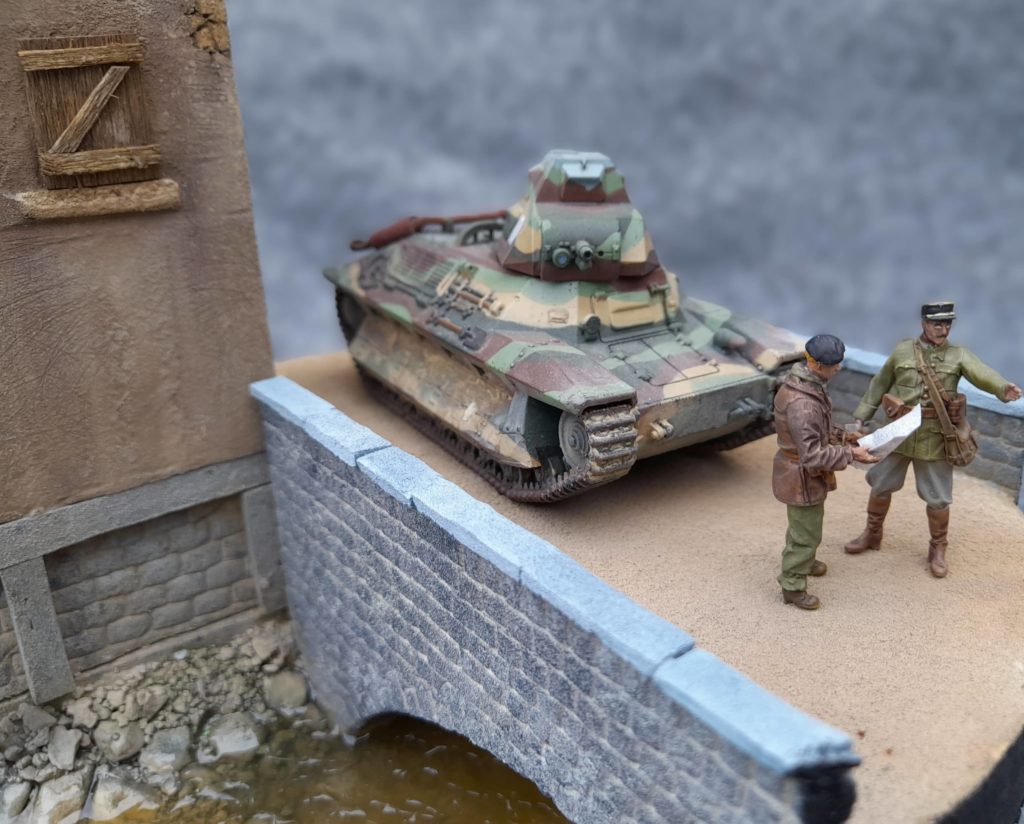
FCM36 – 1/48
This FCM 36, lost in the French countryside, is basically a 1/48 scale wargame kit that’s very easy to assemble since it comes in blocks. It’s painted with XF58, XF60 (highlighted), XF71, and XF64, with washes, drybrushing, pigments, and a diluted earth effect. Something that can be done in four evenings…
The figures are from Dynamo for the officer (also 3D printed) and Gasoline for the tank crewman.
The diorama and buildings are entirely made with styrene and foam board. The riverbed is made of painted cat litter, weathered with a very diluted foam effect. The waterproofing wasn’t great, and I had a lot of trouble getting the Epodex resin runs right. You can see quite a bit of silicone and acrylic gel used to fix it.



Villers-Bocage fight
For a friend I made something cloth from Villers Bocage fight between Wittman Tiger and Cromwell.
Cromwell is from Tamiya and already build when I receive it. Tiger is from dragon and is quiet standart to this brand in Quality, pieces and mistakes.
Diorama is always home made with styrene and 3D part from a friend.


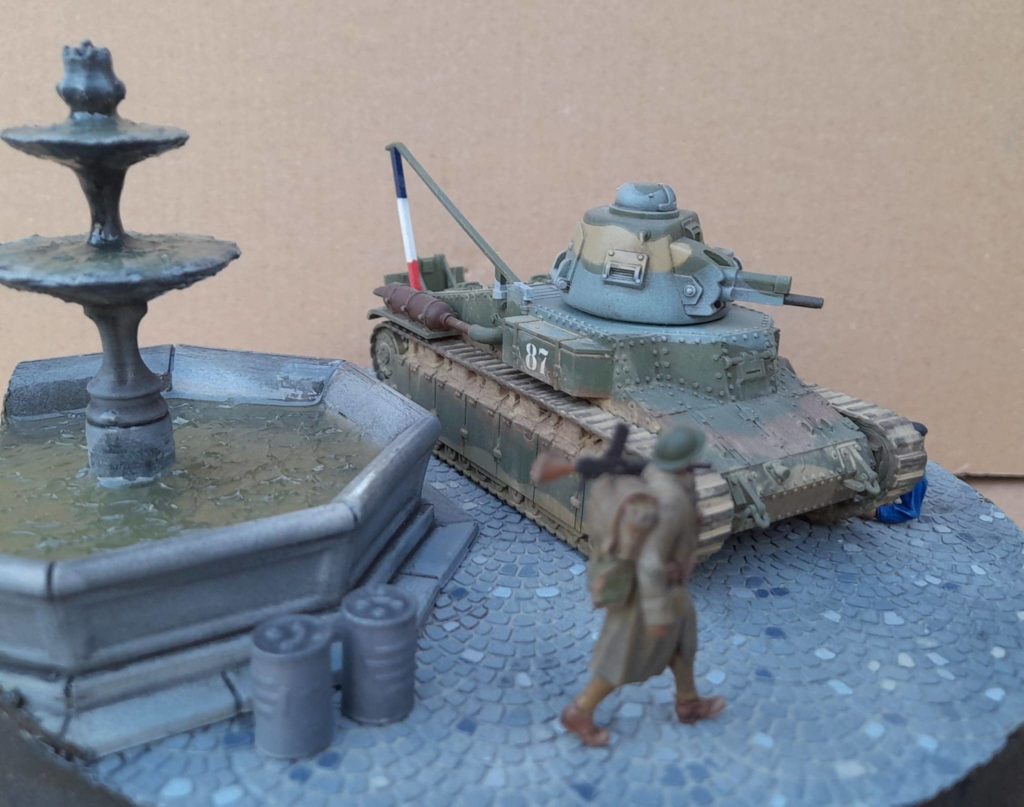
Fransh D1 tank
A small 1/48 scale diorama featuring a 3D-printed D1 tank in a wargaming style, accompanied by Dynamo Model figures. The fountains, jerrycans, and paving stones are also 3D printed. The tank’s colors are XF58, XF60, XF68, and XF23 blue, if I remember correctly.




Hebrew chariot of fire
Merkava
Merkava IV maneuvering with MENG’s anti-mine system, a very big baby, let’s be honest.
Frankly, not much to say; it assembles very well, with no unpleasant surprises. It’s really the kind of kit you don’t have to worry about right out of the box. The only problem is that the final piece with the anti-mine system is relatively large, and the whole thing is imposing. It’s painted with a mix of gray and Tamiya buff (XF20 and XF57), which is a fairly simple solution for getting Sinai Gray without having to worry about versions, brands, and eras. The Black Dog figures are painted with a Vallejo Russian Uniform base and have not been modified. The helmet protection is painted in OCP camouflage. The weapons, on the other hand, are extremely fragile, and their painting requires a lot of attention. The dio is a simple piece of slightly sloping insulation covered with filler and real pebbles, painted, and decorated with flocking.


Normay reise 1940
This model is directly inspired by this photo of German infantrymen taking cover behind a Panzer 1 from the Panzer Abteilung 40, the only armored unit engaged in Norway.
The model of the Panzer 1 Tristar is very basic and can be assembled in a few hours. The plastic, the precision, and the quality of the casting are decent without being outstanding, and the assembly is trouble-free. The plastic link tracks take a long time to assemble, and even if they don’t have any defects or assembly issues, they remain extremely fragile afterward. The panzer is painted German gray after pre-shading. The markings are homemade arrangements from the spare parts box.
The figures are a mix of Tamiya, Stalingrad, and Dragon because I wanted to get as close as possible to the poses in the photo. The colors are: Vallejo green 830 and 979, and gray 836. I changed a few heads, helmets, and weapons to match the photo. The bikes are from miniart and are quite tricky to assemble with all the photo-etching. The plastic is fragile and brittle which makes it difficult to rework to adapt it to the photo-etching, especially for the wheel spokes and the placement of the chain sprockets.


T64 defending home
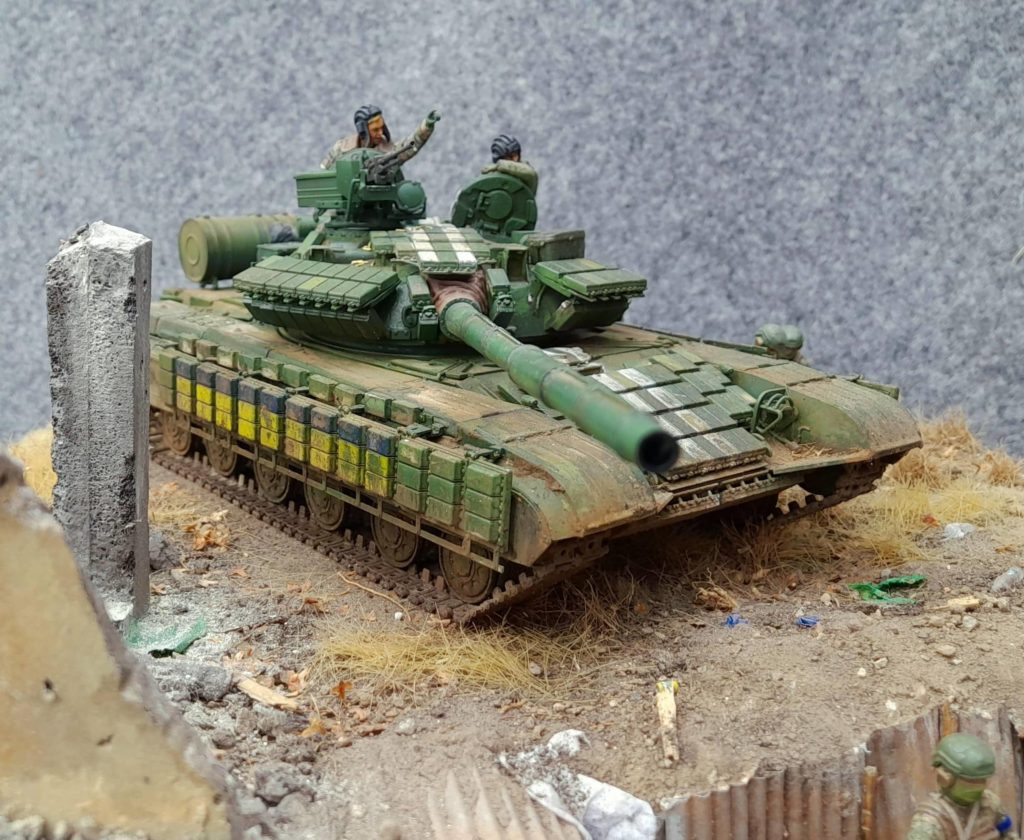
A rather sensitive subject, but unfortunately, current events are a source of inspiration.
The Trumpeter kit is of decent quality, flawless, with no unpleasant surprises, and can be assembled without any hassle by following the instructions, even if it’s not always the best in terms of precision. The tracks are a bit tricky to adjust their length, and the mudguards require a little calm to position. The color is a mix of AK RC231 and RC260 sailcloth with a classic brush wash and a few shades of green for the anti-tank protection boxes. The white lines and the yellow and blue colors are made using the lacquer technique so they can be scuffed. The white lines required a little masking time. The mud is made either with pigments and gloss varnish, or sometimes with real earth sifted and disinfected in the oven.
The figures are from the ICM and Evolution ranges, with pixel camouflage in Vallejo 924, 886, 880, and 872 made with a piece of foam for application, the tanker’s multicam in 886, 922, 983, 826, and 822, and the second tanker’s DPM pants: 922, 847, and 872. There aren’t too many changes to the figures’ postures.
The dio is made on a piece of insulation in which I cut the trench. The sheets are made from Petit Suisse clay or cardboard. The ruin is a homemade DIY with pieces of insulation, elements from the spare parts box, and Velcro and Evergreen. The ground is covered with real dried earth with flocking. I added miniart elements, spare parts boxes or 3D prints to bring urban elements into the decor, crates, drums and cans.




Missing conter-attack
The staging is inspired by a well-known photo taken in Rots, Normandy, on June 9th, after an unsuccessful counterattack by the 12th SS Pzd. on the village of Norrey against the Canadians. What we don’t see in the photo is the little story within the story and the fact that the commander of tank 326 was decapitated by a shell and that the guy (Gerd Krieger) in the back of the Panther is wiping the blood off his commander. I didn’t want to slip into the sordid, but I partially recreated the atmosphere around this retreat by imagining a gathering area for the wounded and medical staff.
The Das Werk Panther is a real beauty, it comes apart easily, assembles well, there is a template for gluing the tracks. The level of detail is good, the precision very good too. The interior has some details on the walls but no elements to represent the equipment, engines, storage and combat station. It is really a direct assembly of the box without too much hassle. The zimmerit is an orange rubber, flexible and cuttable from FUN Model. It is glued with cyano, it is sometimes a little thick and you have to provide putty in certain places to complete. This type of add-on requires not to follow the instructions to the letter according to the cuts and accessibility. I painted the feline in ochre (XF60 / XF57) with green (XF65) and brown (XF68) tamiya borders to then do the usual aging, wash, brushing and dusting.
The Kubel is an old Tamiya version that was lying around in my stash and which I mainly use as a scenery element around the Panther and the wounded. It’s an extremely basic kit, almost pointless for a pure modeler. It’s painted in ochre and brown, and I redid the rear hood.The buildings are homemade with etched and painted insulation, the doors are balsa, the roofs are resin from Diodump and plastic from Miniart. The advertising markings, which you can partially see in the photos, are stenciled, and it’s ultimately the thing that took me the most time. The figures come from Kirin, ADV, dragon, CMK, Jaguar, Wolf and the color references are Vallejo 830 for German green, 825/979/845/833 for the dot Pea Pattern, AWarpaints 1110/vallejo984/847 for the Italian camouflage and 825/979/833 for the Oak Leaf Pattern.


A suuny trip in an AML – Tchad 1978.
1978/1980, Operation Tacaud, an intervention in Chad to support the regular army against the rebel groups of Frolinat.
The Tiger kit is a little marvel, with a detailed interior and a somewhat challenging assembly, but with a really nice result and look. I searched the internet extensively for interior color details, as I wanted to leave some options open. The exterior is a succession of XF58 and XF22 sails and Model Air 71.341. The kit remains quite fragile during handling, and some joints are tricky.
The figures are adaptations of Bravo 6 and Blitz heads to match the period photos. The uniform is Vallejo Iraqi Sand 819 for the shorts and Vallejo Mecha color 69.029 Olive green + green 70.979 + brown 70.984.
The floor is a simple piece of insulation covered with sand and litter. The tree is made from roots, putty, zeechium, and flocking.


I Slid boss, sorry (Berliet GPE and Hotchkiss H39)
Large diorama on a French country road where a rare Berliet GPE (between 5 and 8 examples depending on sources) comes to help out an H39. The Berliet is a tractor/lifter, that is to say a wrecker and tank transporter equipped with a lifting gantry which derives from a large truck from Berliet.


We will start the explanations with the simplest, the H39. It is a version of Bronco which assembles quite well and which presents elements to make the interior including the engine block, perfect for a breakdown scene. The tracks by link are always a little painful but it passes. I painted it taking inspiration from several profiles: Gray XF 75 or 20, brown
The figures are from different origins, Mk35, Verlinden, Dynamo, DesKit and others and they are painted on Vallejo bases: Canva 70314, green 70320, 70881, ocher 70880. I made some adaptations of heads and arms for stick to the staging and the figurine which unloads the trays would have deserved a better adjustment.
THE BERLIET… a vast construction site… it’s a Wesp MODEl resin kit probably taken from the Azimut model and it was rock & roll. The positioning of the parts has to be guessed because the instructions are crap and even if we recognize the function of the parts, their exact positioning and alignment must be tested dry and anticipated in relation to the others. This is the kind of kit where you need a lot of blank assembly to confirm the match. I had to stick with white glue to be able to confirm positions before using proper cyano to permanently seal the assembly.
For the underside, I sanded, drilled and placed the rear wheel differentials (parts 49) using marks for their positioning on the shock absorbers. The drive shafts parts 46,47 and 48 are identical: same casting and dimension even though they need to be different sizes. They are therefore either too short or too long depending on their use. You have to play with the positioning of part 45 (Gearbox) so that the 3 shafts fit roughly. Part 44 (representing the motor) is installed at the end without too much trouble because its position can be adapted in relation to the gearbox. I then attached part 54 and transmission shafts 55 and 56 (after straightening them with hot water). These two trees 55 and 56 are in several copies, of different dimensions in the box and some are broken, that sows doubt… I did the best I could.
For the front bearing, part 58 fits without problems after laborious removal. It is also necessary to thoroughly sand the mudguards (No. 61) and find the different elements parts 57, 59 and 60 which after sanding/drilling align.
I was missing here parts 51 and 52 which I redid even though I do not know their usefulness.
The dashboard was painted green after adding a decal showing the dials covered with a drop of UV-drying resin and we won’t see anything at the end of course.
The alignment of the hood (No. 5) of the cabin (No. 1) of the radiator (No. 7) and of the chassis (No. 50) are correct. It took me a little time to understand the installation of the cabin on the chassis which is done by tilting the cabin forward. I had to check a lot of vintage photos to place part No. 19 of the bumper.
Concerning the rear plate: after having straightened the lifting gantry part 26 with hot water. I re-dug its base to be able to place it while leaving it “mobile” using the rotation axis part 29. J I also made an identical system with metal rods so that the support feet (parts 25) and the thrust axes of the lifting support part 39 remain mobile. It’s useless but it’s fun. The tray is not deformed and it fits quite well on the chassis with markings. At the time of final gluing it was necessary to force the gluing of the rear of the chassis on the plate because there remains a gap which surely comes from the deformation of the rear of the chassis.
The spare wheel area between the cabin and the platform is the most mysterious in its positioning. If part No. 12 of the spare wheels + support is quite obvious, the meaning of parts 13 and 30 must be scraped on the internet and evaluated in relation to the gantry part 26 in the low position because they serve as a rest. Part 11 is wrong in its style and position, I had to replace it with an evergreen profile. The insertion and correspondence of parts 41, 17 and 30 a source of systematic error.
In the realm of corrections it is necessary:
Redo the side covers because we find photos on the internet of the GPE without covers on a single photo, suggesting that it was just a special case. Plastic card, 0.75mm quarter cylinder sections for the vents and metal rods do the job.
Replace a piece of plastic above the windshield because the resin was broken there.
Redo the ramps between the windshield and the doors with evergreen or metal rods
Added small hooks, handles and bolts in places from parts of the rabio box
Correct the position and style of the crossbar above the spare wheels. I added a part from the rabio box to improve the detail of parts 41
Redo parts on the side of the tray because those in the kit were not wide enough, their shape was wrong at the rear and bolts were missing.
Scratch what looks like cable reels on the back of the board. because it is completely absent from the kit even though it is surely the way to erect the gantry
Create the windshield from scratch with plastic card and find windshield wipers in the spare box.
Create the gantry cables with big game fishing cables. I had to assume how the system worked to make something coherent.
Use UV resin for headlights
Objectively, I shit a bit
The sail-based green paint of XF58, and the different separate parts. Washing and brushing and dusting with air veils and pigments. I will then spare you the long lists of breakages and hassles during the final installation on the dio (Wheels, headlights, etc.)
French see bird figther 1/48
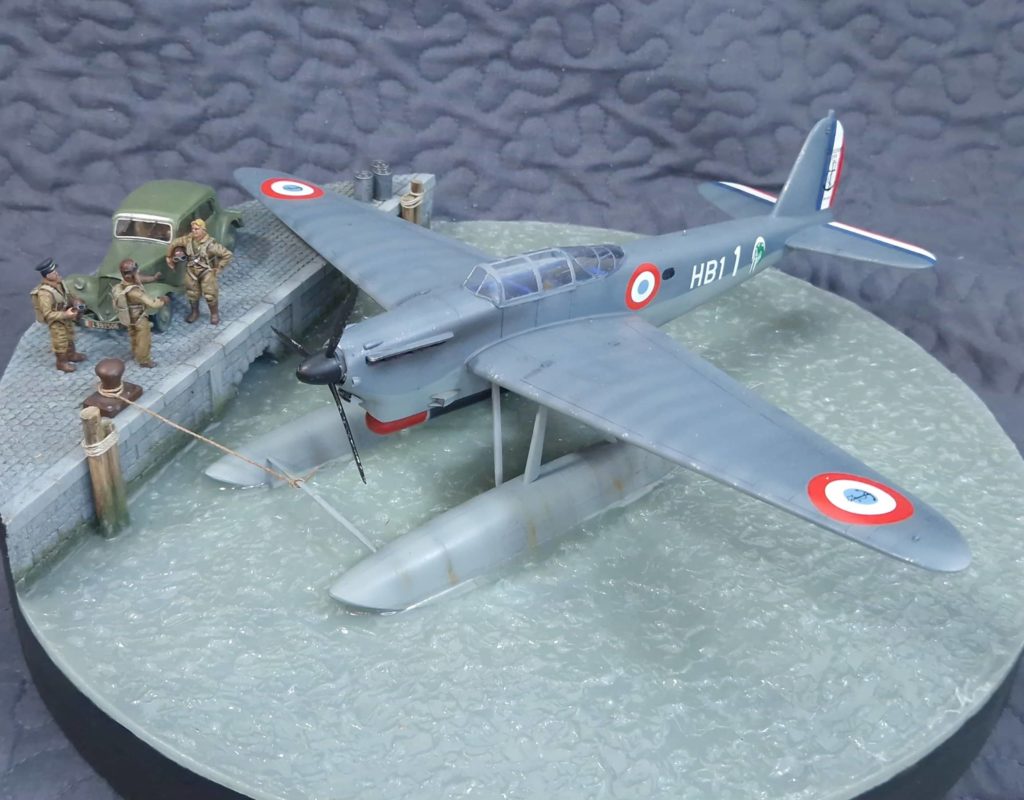
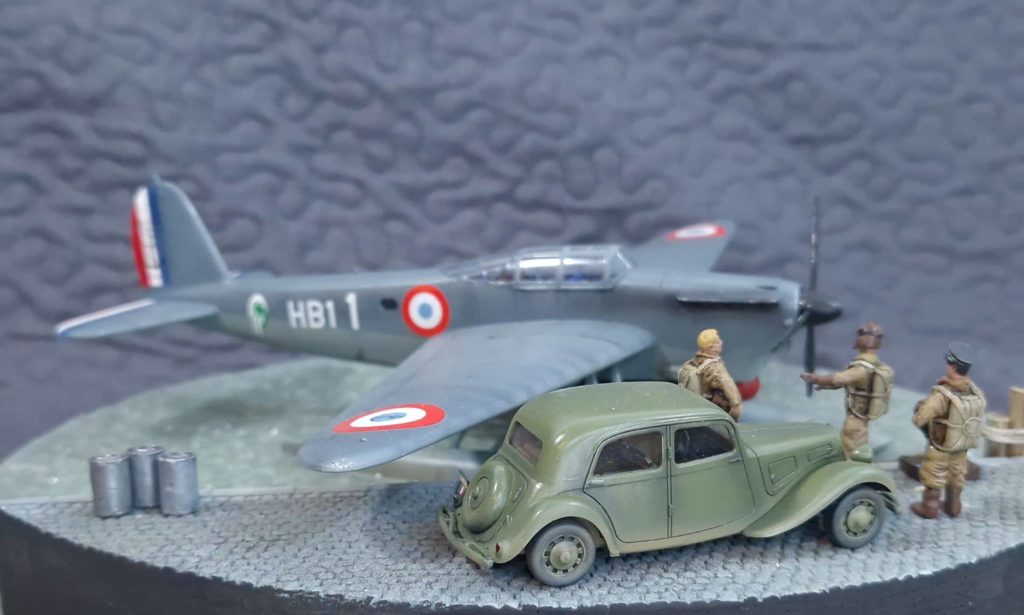
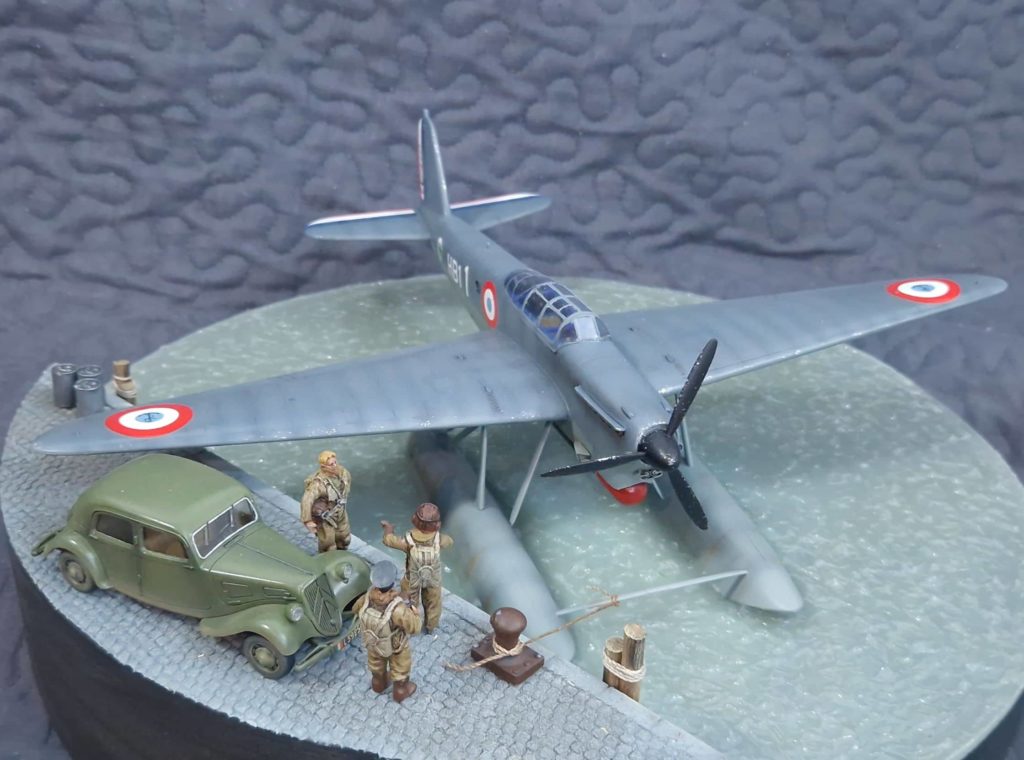
Out of my usual habits, I was tempted by the Latécoère 298 to 1/48 seaplane in a contest, it is not my theme or my usual scale but it is also good to challenge yourself a little and get out of your comfort zone.
Model: The kit of the Latécoère 298 from Hobby easy is just correct. Honestly I struggled a bit and I expected a level of precision and even higher detailing given the price of the kit. It is a replanting of Azur and it lacks landmarks and precision. The rather well detailed interior is assembled well but remains fragile and the placement to test before gluing. I replaced the rear machine gun with a 3D one because after discussion, some colleagues told me that the one in the kit was not the right one. The closing of the fuselage, the cross-fastening and the mounting of the floats require precision because it does not fit perfectly and we had to chew. The installation of the float brackets and their connection to the rest of the device is frankly shitty. There is no reference and it’s just indications of dimension on the notice that serves as reference, you need photos of the time to understand. The Glass in vacuform is very artisanal to cut and install but it passes. The baby is painted in XF25 above and a mix XF24 and XF82. The interior is dark blue which must be close to the night blue. The decals are good but the one of the fin is a little brittle.
The assembly of the 11CV from Tamiya is cream-coloured, without any difficulty and it is painted in drill green from “Petit Matos;
The figs come from Des Kit. Their proportion and posture are a little peculiar and awkward but the detail is present. I have little experience on painting 1/48, I adapted and simplified my habits of 1/35. The uniform is in Vallejo Khaki 880.




Hotchkiss H39 – Help friends
A much-read story of a French armored vehicle detached from its formation to cover a withdrawal or rescue a group of infantry in battles of 40. A bad use of course, but we don’t leave our friends in trouble.
The Hotchkiss is an Ironside kit in incomplete German version. 90% of the kit is the Heller base which remains quite good although not always super fine (tools and fixings) and Ironside/Azymut just put metal tracks per link and resin toothed wheels. On the kit, I just added bolts to the rear and a trunnion system on each side of the barrel. I had a lot of trouble installing the tracks because their width does not fit the Heller kit and I have to cut certain pieces and do a lot of blank testing.
The kit is painted in XF68 and a mix of XF58+grey and the markings are a bit invented based on leftover decals.
The figurines are an old Azimut reference mounted without modification except for the Hotchkiss machine gun whose exact origin I do not know. The uniforms are painted in Canvas vallejo…
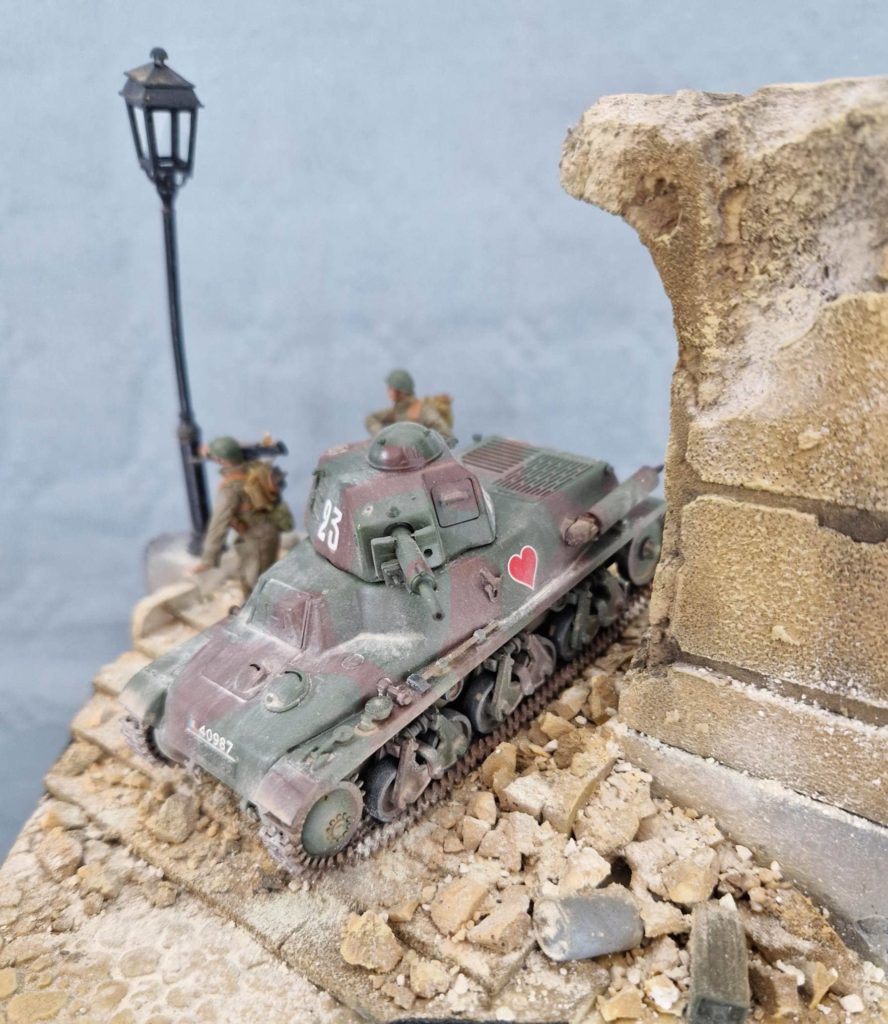
The dio that I wanted to be a little dynamic in its orientation is an insulating base. The stairs and the wall from blue styrene cut with hot wire. The whole thing is painted and then loaded with rubble made from pieces of broken plaster, tile joint powder, and 3D elements. The floor lamp is a Miniart reference.




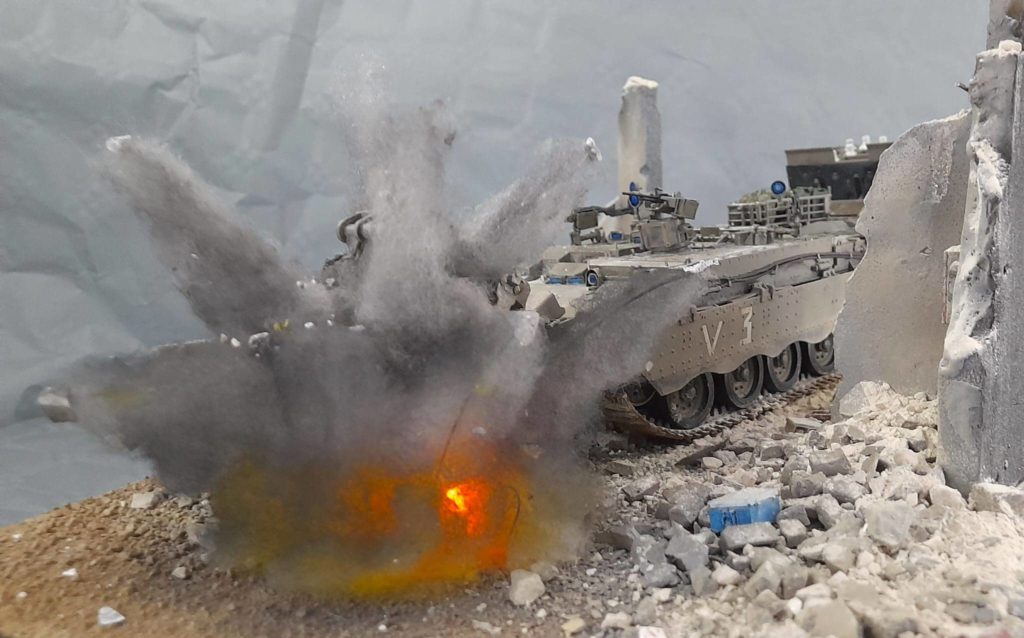
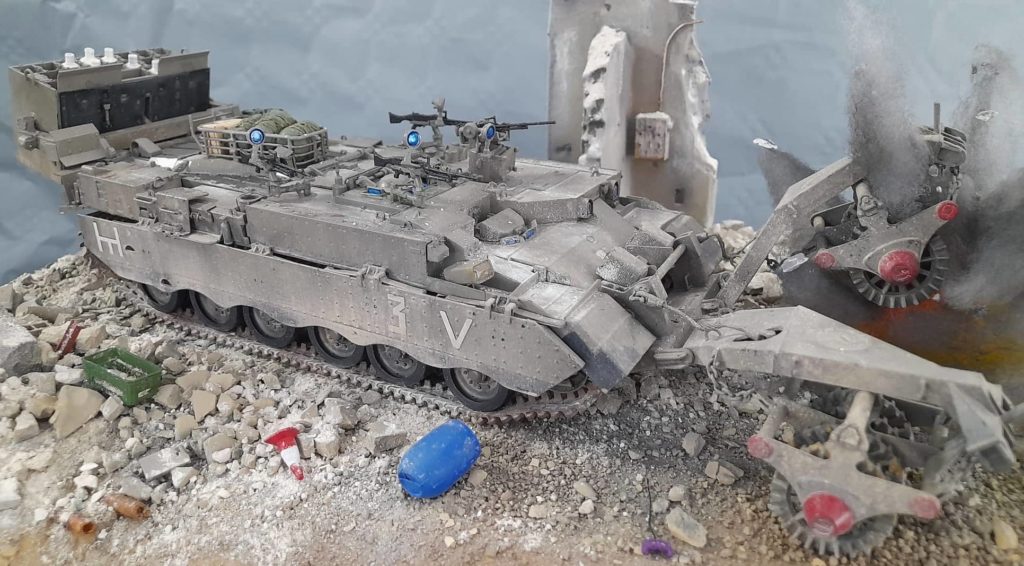
Mine clearance operation – IDF Puma
I did not assemble the model since it is a project to repeat a kit already assembled and painted for a friend. I just had to make a dio. I took the liberty of adding a lick of paint after pre-shading. I used the Sinaï Gray color from Mig and I brushed over the details, including the glass parts which had not stood up well to certain stages, including stripping the original paint.
The dio is a simple plate of insulation on which I stuck earth, rubble mixing plaster, painted insulation and different layers of powder plaster, tile joint, pigments, juices, brushing and some 3D printed elements in a fairly random and improvised order.
I wanted to give dynamism to the dio with an explosion. I found LEDs and a battery box in a small electronic component store during my vacation, I soldered the elements, dug cable passages and for the ignition box, I glued foam / polyurethane fiber air-painted in yellow and black for smoke and added pieces of plaster maintained to imitate projections. The rendering can still be improved and the LED is almost invisible in the end but it was a first attempt on my part on this type of staging




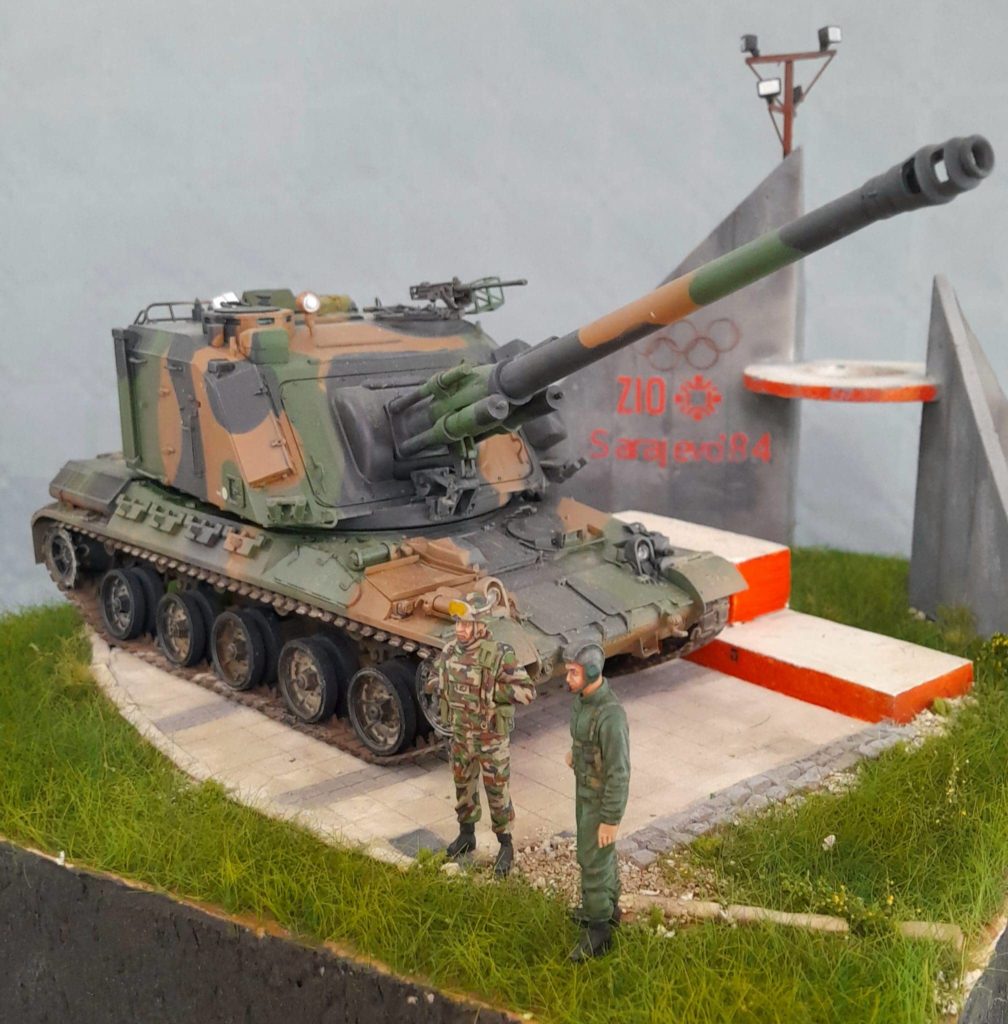
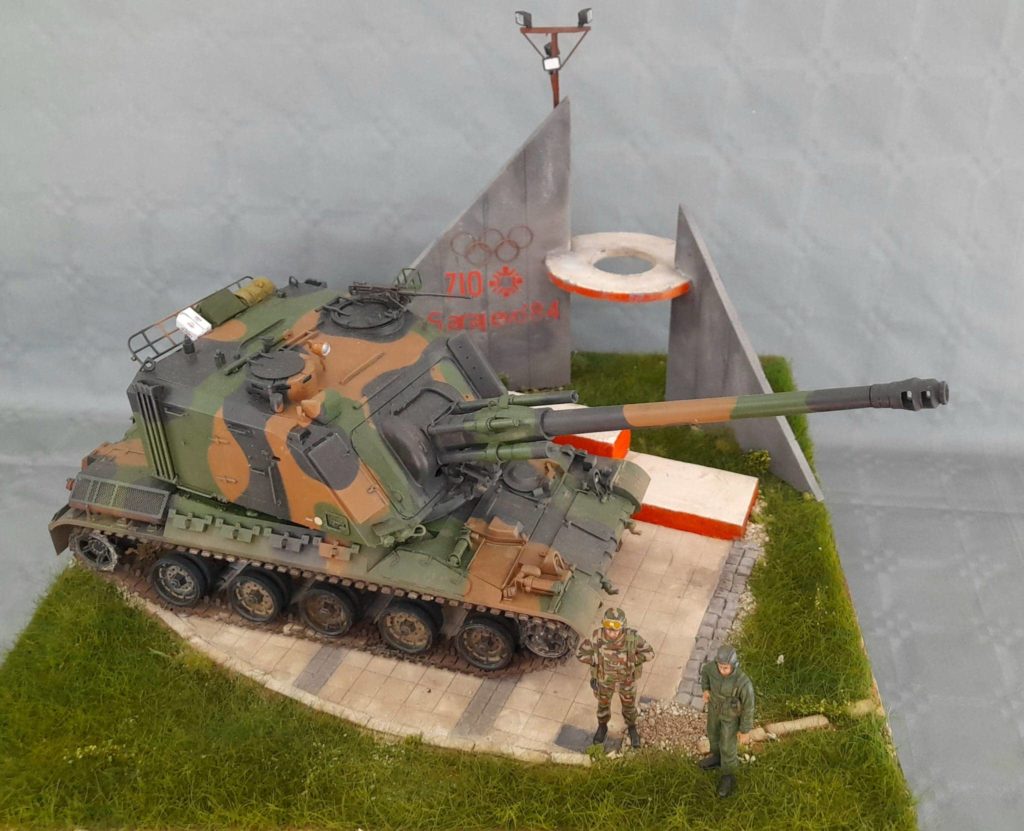
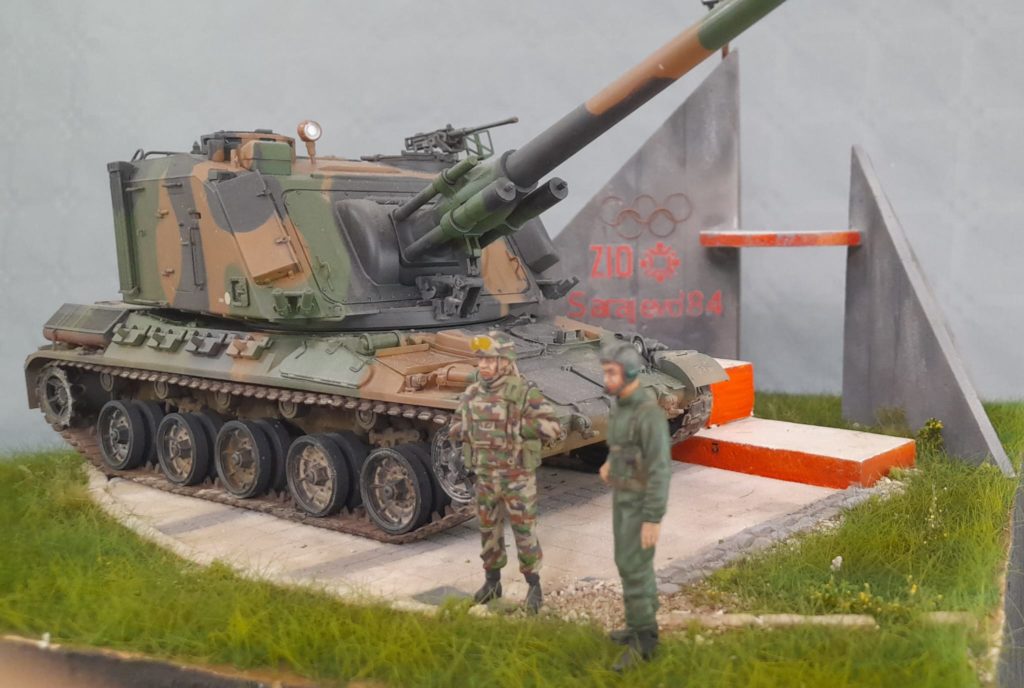
Olympic Auf1
Auf1 at the Winter Olympics
The Hobby Boss Auf1 is correct and has no assembly defects. Its interior detail is very limited because only the storage of the shells is present and it is very basic. For the color, I stuck with the Tamiya references XF68, 69 and 67 but I cut the green with a slightly flashier reference. The dirt is with pigments and I realize that in the photos I could have used more.
The figs are from BLast and KMT without modification. They are very nice to paint and well proportioned.
The dio is an insulating board covered with plaster and flocking. The Winter Olympics building, the podium and the paving stones are made from pieces of insulation and foam board, the inscriptions are homemade decals and the projectors are 3D prints.





Liban 82
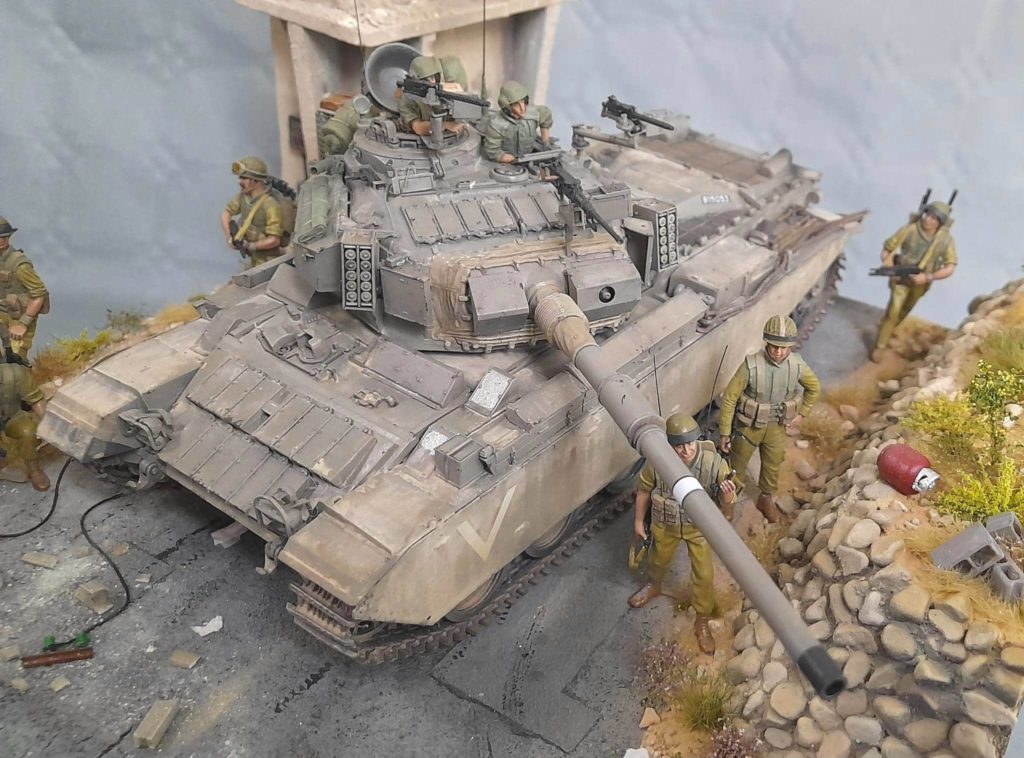
A little trip to the 80s with an IDF Sho’t Kal in Lebanon.
The AFV Sho’t kal model is a decent kit. The level of detail is good, the quantity of parts manageable and not excessive, but I am always disappointed with AFV because the adjustments are bad and you have to use tinkering to make it work. In this kit, I had trouble with the left wing, the wheel protection plates and the turret insertion without really knowing why. Some parts do not fit well and remain fragile. The paint is IDF Sinaï gray 82 ref 71142 from Vallejo and the finish is quite nice.
The figurines are from Italeri, ADV, Verlinden for the infantry with some head, weapon and posture adaptations and Walkiri for the crew. The crew is really good in terms of quality, finesse and adaptation to the tank. The infantry is more delicate but the availability of IDF figs from this period is limited. The Italeri/dragon figs are frankly of low quality. The poses are crude and, aside from the faces, the finesse is poor. The ADV fig is prettier and finer but the face is ugly and twisted. The fig verlinden is of good quality despite a somewhat rigid posture. They are painted in Vallejo 881 (Yellow green) for the uniform after trying lots of colors and mixes.
The dio is homemade with the road in…, a house made of featherboard, some personal 3D prints for the furniture and decorative elements, a resin pylon whose origin I don’t know and miniart electrical wiring.


Reich tourisme
The Dragon JS2 is a basic model without interior details and which has no defects and is assembled without surprises and quite quickly. The link tracks are always a little tricky to assemble because they have to be glued and I had a bit of trouble painting the white stripes because masking on rounded surfaces is complicated. The Wagon Dragon is of the same order, the difficulty was to cut it cleanly and make it fit but it is easy to assemble. The Das Werkt anti-aircraft gun is also easy and quick to assemble except for the alignment of the tubes and muzzle brakes. The different colorings are classic, pre-shading, washing, brushing, chipping and dusting with pigment and brick dust.
The figurines come from dragons for the Germans, from Tamiya, Stalingrad and D-Day for the Russians. Given the quantity of figures to paint, I didn’t have fun modifying them too much.
The real challenge is the dio which combines a factory base found on the internet and modified including the door, the roof and part of the wall that I mixed with scratched and engraved elements based on feather board, insulating foam , evergreen, Swiss petis pots, real brick rubble, elements of the rabiot box. Once painted, we sprinkle pigments, brick dust and plaster to thoroughly dirty and homogenize the atmosphere.


Romania Tank
The Bronco model is complicated, the assembly generally precise and made difficult by the number of parts and their small size and instructions that are not always very clear on the exact position. It’s quite delicate in this type of assembly where the slightest error shifts the whole thing. I admit that I have sometimes deliberately omitted or removed invisible parts to ensure the alignment of larger elements. This was particularly the case for the final bonding of the mudguards and the turret support part. However, Bonco remains a brand that challenges the editor, which remains well detailed and with a little know-how produces beautiful models. It is painted in XF58 and the decals come from a star decals board. The installation of the tracks by link was complicated because the links which clip are not always good and they unclip during installation. Fortunately there are too many links and the defective ones can easily be replaced. The smart guy will notice that I did not put the same number of links on each side, the installation of the tracks having been delicate, I lost my count a little…
No hassle for the dio, a piece of quickly cut insulation, 3 branches of thyme, tufts of dry grass and a layer of baking soda.
The figurines from D-Day are very nice, assembled without modification and painted trying to respect the photos of the uniforms more than the illustration of the boxes. The Romanian uniform is neither green nor khaki but frankly brown. I cobbled together a tank commander based on a German fig in a jacket, putty, new arms, 3D hands and an ICM head I think.


Tank carrier Bernard truck
The Bernard tank truck is a Blitz reference in resin. There is little molding residue and appreciable mounting lugs and marks for such a large part. There is a large core at the level of the roof of the cabin which is difficult to remove and damages the area and cores at the level of each wheel which are sanded and which will be hidden because they are in contact with the ground. A large carrot along the plateau did not cause any problems. There are casting defects on certain wheels and especially on the openings (windows and doors) of the cabin which need to be sanded and corrected. The big hiccup is the molding of two elements on the roof of the cabin whose origin I do not know and for which I have not found a photo for correction. The wheels and hubcap remain a little deformed and require attention for adjustments and you even have to perforate them to insert them. I replaced the wheel mounting posts in the kit with stronger metal paper clip posts.
Assembly is done without difficulty or fault and is ultimately quite quick despite the size of the kit. It took a few corrections as follows: shorten 12 of the 20 parts No. 50 in 3D printing which are installed under the plate, remove central bolts on parts No. 1 and 2 to install the Slat No. 8 shock absorbers, drill into parts No. 30 (rear wheel support) to insert supports 25 and 10 and move the positioning of part No. 24 to align it with uprights No. 67 of the plate. I worked in 3 sub-assemblies: Chassis, Platform and Cabin/Hood with an additional 1 sub-assembly for the interior, I painted the sub-assemblies separately and only permanently glued them at the end. The paint is in XF28 and XF5 on a fairly simple black and white base. I poured resin into the headlights and used the board for the registration, taking inspiration from the number taken from a magazine.
The ICM FCM 36 was mounted directly from the box and I found it not bad and pleasant to assemble. I just changed the channel. It is painted in XF68, 57, 58, 76 and light blue according to a scheme taken from GBM. The motorcycle is a 3D print of only two parts and which mainly requires time to dismantle and ultimately serves as a decorative element. It is painted with the green reference LPM 1011 from “Petit Matos”. 6 figurines accompany the truck, a biker, 2 crew members, a mechanic, a DIY driver and a civilian. There is blitz, nemrod, ICM and east-model.
The building is from Diodump and the large resin parts require a bit of work to be adjusted because they are slightly deformed and you have to put them in boiling water and sand to adjust everything. The building remains very beautiful and bucolic. The diorama is cut from insulation. The wall is made with broken pieces of plaster.


Djebel sécurité patrol
The EBR 11 comes from Hobby boss and I apologize if it is not the version used in Algeria, I am not an expert in this period, I had the details during assembly. It assembles without difficulty and a small detailing or version correction set would have been welcome. Hobby boss made some mistak which are explained on the site http://olivier.carneau.free.fr/ and I corrected a few points. My only concern was the installation of certain photoetched elements. The vehicle is painted in XF58 with some touch-ups with a lighter green.
The figurines are of 3 origins: a bravo 6 figurine with a new blitz head, a MAS Heller rifle and a puty chèche, a US metal fig in Vietnam of unknown origin in metal with a new blitz head, a chèche, arms different, a MAT49 Heller and a 3D radio and finally an unmodified figurine of the Legion 2 REI in metal (re-released from Nemrod) I then added a MAT49 in 3D and a DIY bag.
The dio is based on a piece of insulation. The floor is made with real pebble cat litter from my vacation. It’s painted by instinct and I glued commercial vegetation elements.


80ies gun on wheels
This is a command of a old soldier, friend of mine and it’s a Meng AMX30B at the end of the eighties. Kit is pretty nice with no default built directly from the box. Just tracks are delicate to build. Color is XF69, XF68 and XF67 mixed with XF5 for a french flashy green. Figurines from blast and KMt are painted with vallejo 823, 967 and 979. Building is home made with isolating and plastic parts. Roads and vegetation are commercial products arranged and re-paint. Sign and pound are miniart references.


No retreat spirit
June 1940 an old and little Renault ACG1 tank tried to slow down German troops between Seine and Loire with no retreat spirit.
ACG 1 was a Renault try to carry tank for French cavalry in 1935 but production problems, insufficient armor and weapons despite an interesting 2 seat turret made it less performante in front of other tanks. It was no longer used in may 1940 but reused in june…The Resin ACG1 kit is from Azymut and really pleasant to build with a motor, an interior and separated metal track. I just add part of the turret interior details and move boogies from a couple mm to align them with the tracks. Paint is XF 10 – XF 68 – XF 71 – X16/XF4 – XF58 – Mig 0062.
75 mm gun, is a poor kit from TOM, very basic and only used as a decor building.
Sdkfz is a kit from Dragon, complete and quite hard to build because of little pieces and PE parts. Notice is sometimes strange and wrong.
Figurines are from Tamiya and Dragon with some adaptation to enter in the Sdkfz. Sorry if some uniforms are maybe wrong.
Diorama is home made with crystal resin, commercial vegetation and road coated, Blitz, Heller and Deskit equipment, scratch building.


Autocanon Peugeot – Grandpa’s car
This is a ww1 Peugeot “Auto-canon” from Blitz kit. The kit is a mix of resin an 3D print with 40 pieces. The two resin pieces are the same quality as usual for this company with no mold and building problem. 3D pieces are new for me. They were good prints and look stronger than resin. I had to change wheels with the manufacturer and I had to used dremel on all 3D part to erase a kind of streak left by 3D print process. This was a long job. Building was not really hard for an experienced builder, this is not a beginner kit. Paint is a mix of XF19 and XF82 added with blue X14. Figurines from Blitz, Tank and Nemrod had no change except some heads. I used a vallejo 943 as the color base and I added vallejo 965 and/or 904 for having different kinds of blue and different worn aspects on clothes. Building is a really bad market product that needs a lot of work to be corrected. Ground is natural dry earth, base is isolating foam, vegetation a mix of homemade and market products.


BARKHANE
All both kit are built from the box and painted with XF67, XF68 and XF69. AMX from Tiger is a nice kit not really easy but complex, attractive and without default. VBL from Hobby bos is a middle quality model, retail level is low, adjustment perfectable and it made it hard to build and fragile. I used pigment and aerographe for dirt. Figurines are from Blast model and Valkyrie. They are painted with Vallejo 876 or 819, 880 and Mig 0069. I home made Famas French gun with 3D print. Diorama in made with plaster, sand and liter. Vegetation are dry grass flocage for train and from mininatur. Trees are made with zeechium reinforced with metal string and putty, sheet are grass or special flocage.


Lancia 1ZM – Spain 1938
This is a one of the 8 Italian Lancia 1ZM from CTV (Corpo Truppe Volontare) during the Spanish Civil war. The kit from Copper State model is pretty cool but not easy. Instructions are really clear, number of pieces within reason and detailing nice. But there are still mouldeds defaults and some assemblies are not perfect. Paint scheme is from a Spanish book done with XF59, H64 and XF71 with aerograph and Vallejo 979 and Mig 0139 with pencil to correct lots of masking problems I had. Figurine from Model Victoria and Alarmi are just perfect. Uniforms are Vallejo 888 and mix 965/943 for the blue. Diorama is home made with balsa, isolating polystyrene, plaster, 3D pieces and different object from my own excess pieces stock.


Strange goat
This vehicle was developed by the US army for Vietnam and Asian operations but never used for this war. This is a transportation and amphibian vehicle with a very special articulation for the trailer that gives it facilities for driving on rough terrain. Tamiya kit is really clean and easy to build in only a couple of hours. MERC camouflage was made with … Figurines are the tamiya box original driver and a vietnam war soldier from bravo6 with new arms, 3D print new helmet and M16 gun. Uniform is vallejo 877, Mig 0061 and prince August 895. Diorama is home made with isolating pieces, Epodex bicomponent resin and natural or commercial plants. Epodex resin is colored with some XF 59 and acrylic gel are used for tightness guarantee.


Berlin 45
This is a Berlin fight diorama with Zvezda T-34 kit and Dragons figurines.
The Zvezda kit is clearly bad with poor plastic quality, twisted pieces, and very basic details. I changed vinyl tracks by individual Dragon tracks to make them easier to modify for a wreck tank. Paint is Vallejo 71017 on black/white effect.
Figurines are from dragon with no modification because they clearly do the job for the staging. Paints are Vallejo 830, 823, 988, 892 and 981 for uniforms.
Building and diorama are personal work with isolating polystyrene, cupboard, balsa and platers.


Hungarian dance
Tiger II kit from Hobby boss is pretty clean to build with no default except track which are the wrong version and had been replaced by tamiya tracks. Schwimmwagen et Sdkfz from Tamiya are clean and easy to build. sdkfz is not the best version compared to the end of war and the kit starts to be old compared to the actuel kit. The Colors are XF60, XF67 and XF68 with white camouflage. Figurines are a mix from several origin with a couple of modifications. Diorama is made with dirt, acrylic gel, flocage and white paint. Building is home made with balsa foam.


Amphibious walk
Here is the LARC amphibious truck from Gecko Model. It’s a complete and good kit with a very well done instruction book. It’s not a kit for beginners because there are a lot of pieces and PE but it’s precise without any building problem Just a couple of mistakes on instructions for seats and machine gun. I started building the cabine to quickly include figurines and closed it. Figurines are from Bravo 6. There are some decals for detailing the driving cabine. I think I paint it in XF19 but I’m not sure.
Diorama is a round base of isolating polystyrene, ground is made with sand covered by acrylic gel. Rock is a piece of wood dried by an oven, covered by glue to make it waterproof and paint. I built a formwork and flowed 6 or 8 water resins colorized with a little bite of blue crystal color. It works pretty well but i had bubbles, resin waste because it was an old pot and some default after taking off the formwork. I had to sand contour to make it better.


Persian sun
Here is a TAKOM Chieftain during war between Iran and Iraq that I build for a “desert” challenge on a french scale model forum.
Takom kit is really nice with no default or surprise and no absurd over detailing. Kit is good for all kind of modelers. The only problem I had was to manage the connection between pieces and cluster , because it’s so thick and it can damage the piece when cutting. I recommend to saw those jonction. There is a couple of bonding joint hard to make disappear.
I start building and painting wheels and tracks before protecting them and build the rest of the kit. Paint is a mix of XF55 and XF57.
Figurines are miniart reference. They need work to clean plastic and to be adapted to the tank. I forgot the color I had used.
Building is a home made construction with insulating. I was inspired by real photo of persian palaces and mosques. Islamic tile are home made decals. sculpture are made with greenstuff roll on Fimo paste or feather board. Road is made with commercial coated from AK , ground and rubble are AK sand coated with painted sand, litter and plaster pieces.


US AND SNOW
This diorama shows a very classical US team during buggle battle. I used basic Tamiya jeep and add resin chained-wheels. Sherman is directly from the AZUKA box and was really nice to build but not for beginners. This kit is precise, complete with just enough complexity. Motorbike, from Miniart was a hell to build, too many littles pieces and hard photo-edge parts. They are all painted with olive drab tamiya XF62 or Mig 0926 with a white camouflage on the sherman and covered with pigments for the budd.
Figurines are from differents origin and nd have not been modified. Paint are …
Diorama is a piece of isolating polystyren cover with real dirt and dry coffee for the mudd, natrium bi carbonate for the snow and crytal resin for the ice. Snow is complete on the road and on the kit woith a special snow product from an unknow product. Building is home made with balsa, plastic, molded parts and foam board.


This is a M11/39 tank lost in the Egyptian desert during Italian offensif over English in 1940. Kit from Brach is really good, piece’s preparation is reduced, and assembly is easy with no mistakes. Individual tracks are good despite some jonction staying brittle. Only piece… show 3 moulte defaut that need to be corrected. Paint is XF60 and mix XF67/26 with classical drybrush, spalling with vallejo 847 and 822 and dusting.
Figurines from Allarmi and Royal Model don’t need any modification and are really gret quality. Uniforme is Vallejo 965/943 for blue et 977 or … or a mix for sand color closes.
Diorama is an isolating piece, sand is a commercial product from AK used with or without water and paint with XF59 after a black and white effect


Rescue from battle
This is resin kit From Deskit of a French Renault TRC 36 (Tank Refueling Tractor) rescue wounded soldiers in may 1940. Kit is pretty good without modification from myself. I first built inside to place the driver with new steering levers. Tracks are done by section and are not hard to manage with boiling water and a hair dryer as soon as you fix the first section on the biggest wheels. You just have to cut the last section that’s touching the ground. Trailer is from bronco. Peint is XF58.
Figurines were the biggest work of this project. Driver is an ADVM resin Lorraine 37L crew with curved legs and modified arms. In the back there is a verlinden tank crew, a French motorized Dragon from ADVM Lorraine 37L crew with a new wounded hornet head and a Blitz Zouave with a new head and wounded arm. In a trailer there is a senegalese soldier made with modified Japanese figurine and hornet head and a scratch wounded man lying down under a blanket made with an aluminum piece.
Diorama is made with insulating polystyrene, with acrylic asphalt product for the road which did a really nice effect, classical vegetation, verlinden Chapel, paint, pigment and dust.


Crossing Mass Belgium.may 1940
Here are elements of the 7st panzer division crossing the Mass river around the village of Houx in Belgium in may 1940 inspired by this photo.
Barges and pontoons are all scratch made using an internet tutorial from Diether Ezel. I spent several months building them because it was my first real strong scratch experience and had to adapt the building compared to the evergreen references I can get and missing part of the tutorial. I had a real problem of final fixing color and waterproof because of the quality of plastic and glue in the time but the result look good enough for me.
Kit of the 15 cm sIG 33 auf Panzerkampfwagen I Ausf B is from Dragon with usual quality and building level and too many pieces. Tracks are separated pieces and are always boring to build. But global building and results are good.
Horch 15 is an easy, basic and cheap italeri kit. I only scratch the hood. A lot of sets, weapons and equipment are added to furnish vehicules.
Sturmboat is a Dragon’s kit too with the figurines, very easy to build. All boats and vehicles are painted with Tamiya XF63.
Figurines are from several origins and all from my rest-box with some new heads or arms to adapt them to the staging.
Diorama was the harder part of this project because I missed it a couple of times and tried new techniques that finally didn’t work. I used a 50×40 cm insulating polystyrene, I dig on it the boat and barges site on 1cm deep and paint it un XF49. Then I built a formwork to sink 4mm of colored inclusion resine. Waves are made with acrylique gel at the end.
Scratch build tutorial is https://miniscaping.com/guide/28/pic/view


AMR 33 – 2d RDP – Belgium 1940
This is an french Renault AMR 33 from 2sd RDP in Belgium in may 1940. Kit is resin from Blitz without any mould defect, pretty simple to build because there is not a lot of pieces and some parts are mould in bloc. pieces are pretty clean and doesn’t ask a lot of preparation.
The real problem are the tracks because there are bad mould and it’s always delicate to fold them. I used hot water and had to cut some tracks part and partially glue them on the wheels.. Otherwise alignment of wheels has to be done carefully and sometimes corrected : cut some tooth on the cogwheel, change the support of return wheels and add a part on the central bogie.
Paint is XF 68, XF71, XF60 and XF58 with a strong work of masking and inspired from a magasine. Decals are from Peddinhouse.
Figurines are from Blitz kit and Deskit. the diorama is competellyhome made, even the trunk that is sculpted in putty.

Morris CS9 from 12th Lancier – 1940
this is the British Morris CS9 from the 12th lancier with the BEF somewhere in France in 1940. This vehicle is a commercial C9 truck with Bren and Antitank Boys rifles.
The kit is resin from Resicats with a detailed interior and really nice PE. Cleaning and preparing pieces is pretty easy but the note is sometimes mysterious.
Building is not hard if you take time and try. The only delicate part is building, aligning the block of principal pieces : floor B10, hood A3, cockpit A2 and lateral and behind pieces A5, A7, A13 and A14. All this part must be made with effort, precaution and peace. Rest of the building has to be glued on this block.
Pieces “O”, “P”, “Q” et “R” are not indicated on the grappe and there is a photo at the end of the note to understand how to fix them, because it’s a big mystery . Piece XX must be piece 29.I replace Bren and the Antichar Boy rifle with a plastic version from my stock because they look fragile.
Paint is Dark green 4 (mix 3/2 of XF62 and XF59 with some Gunze H65) and Khaki green 3 (mix 3/2 XF61 and XF58).
Figurines are Miniart with hornet head paint with Vallejo 921.
Diorama is home made with Miniart, resin and Tamiya stuff, balsa, foam and Green stuff roof.

THUIS back to belgium sept 44
This diorama is showing Belgium brigade Piron back in Belgium on 4th septembre 1944 by Rongy Village. I live in the region and it’s a local historical event with commemoration every year.
Daimler in Accured Armour resin kit with no problem for building except notice understanding. It was painted in Mig 0926 and Tamiya XF51. Decals are from DACO. Moto Triumph is Bronco kit and was hard to build because of a lot of very little pieces. It was painted in Mif 0926.
Figurines are a big mix with a lot of modification (heads, hands, arms). I used : Miniart, Prieser, Mk 35, Staligrad and Resicast and they are not the same quality. I can’t remember every color I used, only for warriors who are in Vallejo 9821.
Street, wall and pavement are sculpted and painted plum cardboard, roof is resin product from Greenstuff, windows and doors are balsa and plastic homemade, curtain is woman lingerie.
Enjoy picture


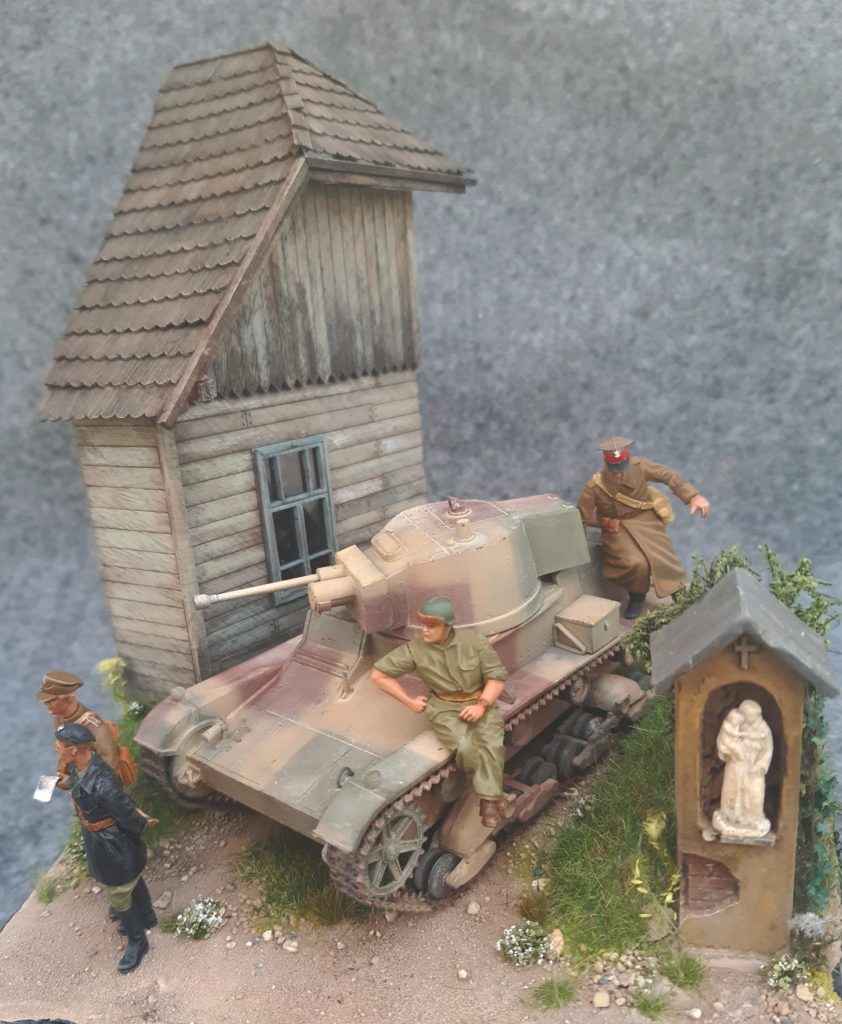
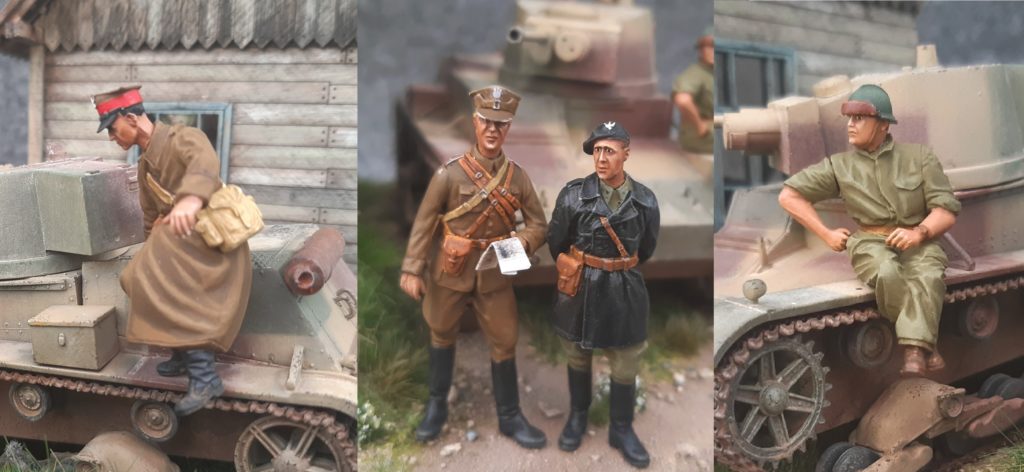
Poland 1939
Little travel in 1939 with a 7TP tank from Mirage. The kit is bassis and archaic, a few number of piece, low detail, some bad molding and problems when you must cut off pieces from the cluster. But building is really easy with this kind of very basic old kit. Paint are XF57, XF65 and XF68. Tracks are from modelkasten, really better than original tracks but long to build and breakable when you manipulate them.
Figurines are from Wolf, Toromodel, modified tamiya with hornet head and unknow resin tank crew with a modified ICM head and helmet. Uniforms are painted with Vallejo 921 and


AMR35 – Belgium 1940
Here is a diorama about may 40 retirment that I try to do dynamic and dramatic.
AMR-35 is a resin kit from Bltiz that have a couple of default with the wheels size and tracks but I knew it from a magazine and I managed them pretty correctly. I add a machine gun support that I saw on photo of AMR-35 ZT1 version and I’m not sure that it was used on ZT2 version but I did it nevertheless.
Color are XF58 green, mix of XF21 and XF5 for light green, humbrol 124 for grey, Ammo mig 061 for yellow and Ammo mig 064 for brown.
Decals are a home made mix from different origin but I inspired myself with the book of Erik Barbanson about history and battle of 2d and 3rd DLM.
Figurines are from ICM and Heller with a couple of new head, arms and equipment.
Rebel machine gun is in 3D printing from Shapewa, anti-tank gun is an old and basic Heller kit stray from the box.
Diorama is made with polystyrene, plaster, sculpted card board, dry earth and floking.
Accessories are from ICM, Blitz, Miniart and from my stand up box.


